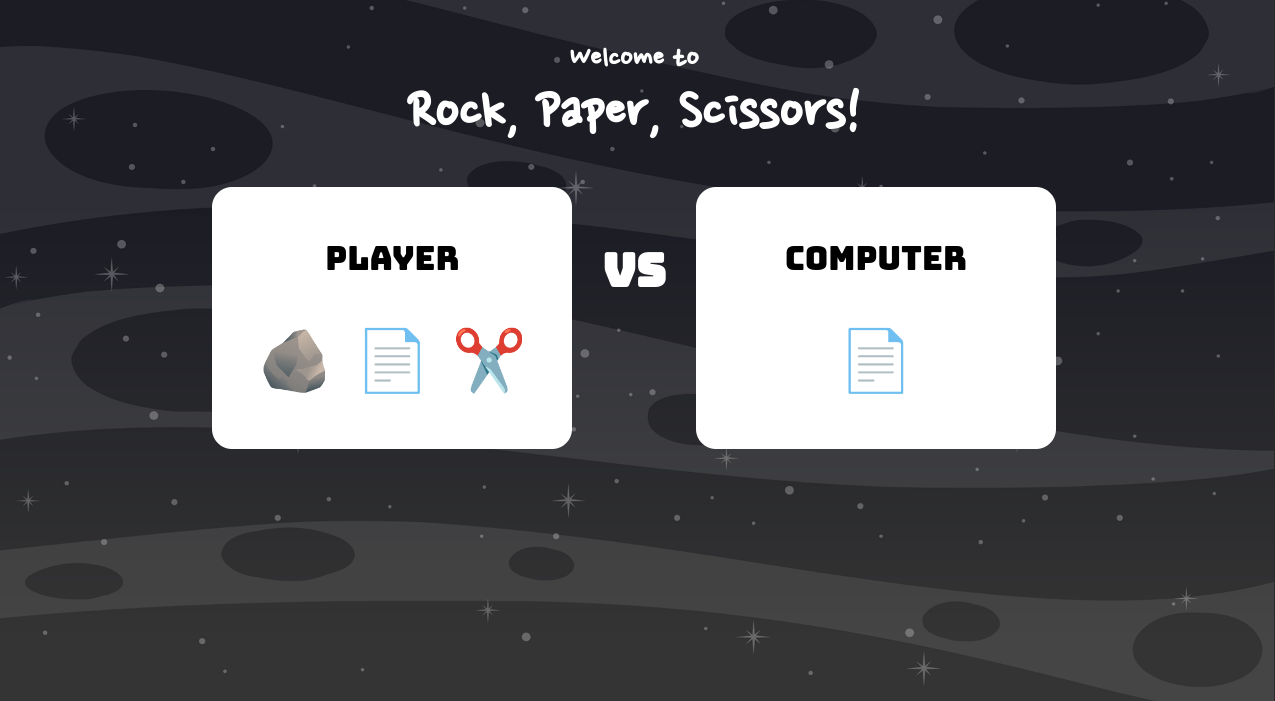
Is rock, paper, scissors more about skill or luck? Everyone has their own theory, but it’s one of those games that we all love to play when we’re bored.
The logic is relatively simple, so it’s an easy game for beginners to turn into code too. You can replicate this game in any coding language, but JavaScript is a great way to play.
In this tutorial, we’ll automate a game of Rock, Paper, Scissors versus the computer. Use computational thinking to setup the game and handle the possible game outcomes. Follow this tutorial to build your own rock, paper, scissors game and try out your luck (or skills!).
Complete this JavaScript tutorial to make your own Rock, Paper, Scissors game.
Play the completed Rock, Paper, Scissors.

Recommended: JavaScript for Kids
Tutorial Steps
- Step 1: Add some setup code to handle the player’s choice
- Step 2: Add logic to handle the player’s choice
- Step 3: Show an emoji on the page for the computer’s choice
- Step 4: Shuffle the computer’s emoji choices
- Step 5: Pick a random emoji for the computer
- Step 6: Decide who won the game
- Finished project!
What you need:
1. Text editor
We’ll be using the CodeWizardsHQ editor to write and run our JavaScript code.
You can also use an online text editor like replit that allows you to author and run JavaScript programs in a web browser. Make sure you have all of the project base files in order for your program to work correctly.
2. Base Files
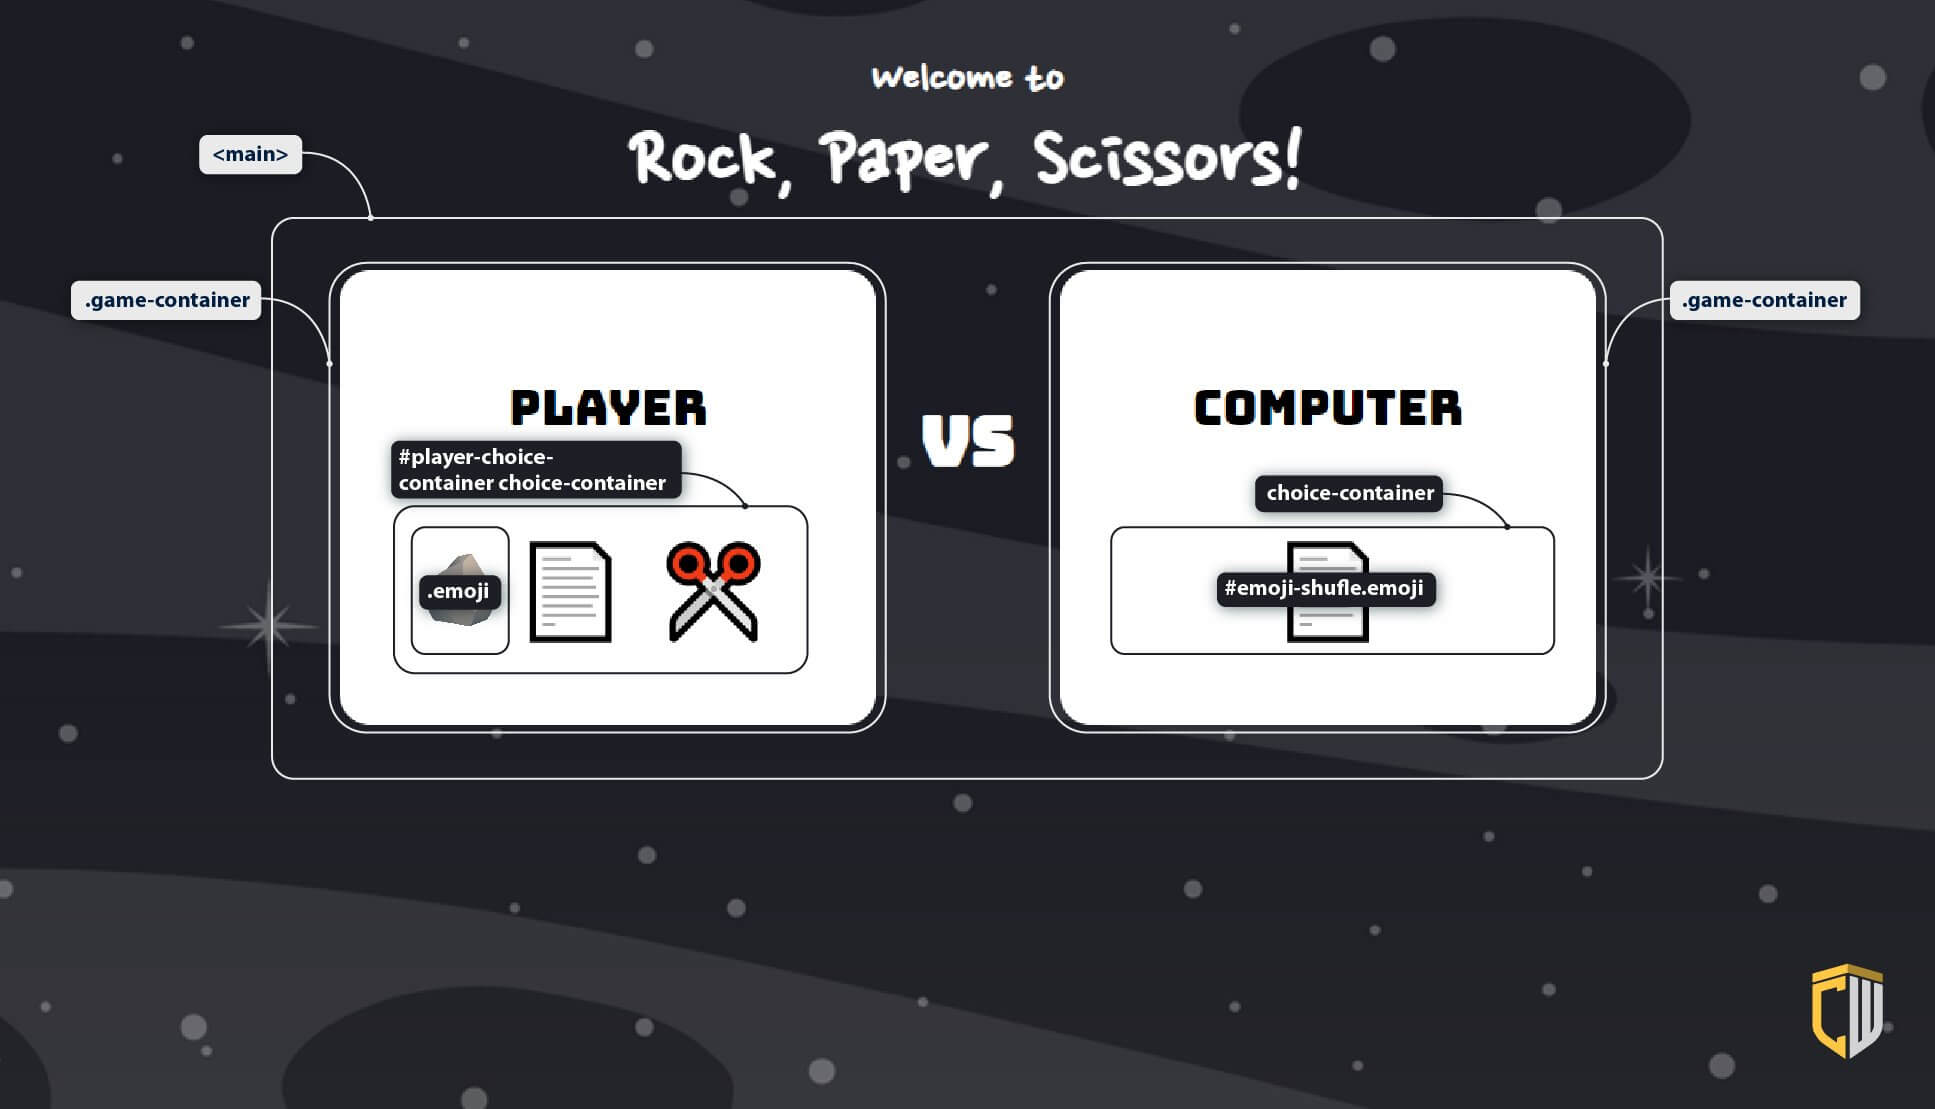
Download the base files and open the app.js file. This folder contains all the images and files you will need to complete your game.
- The HTML file holds the page title, emojis, and Player/Computer choice text.
- The CSS file adds some styling to our page and helps lay out the HTML elements.
- The
error-handler.jsfile will display a big red error box on the page if you make an error while typing out your JavaScript code. - The
app.jsfile is where we’ll write our application code.
If you’re a CodeWizardsHQ student, download the x_hour_of_code_2022 project for the completed code. The starter files are in the javascript-projects/rock-paper-scissors/starter-files directory.
Note: The index.html file (which executes the JavaScript) expects the filename app.js so you must use the same file name if you’re using your own text editor! You’ll edit the app.js file but you’ll always run the index.html file.
This tutorial is for beginner JavaScript programmers ages 8+. It assumes you understand basic HTML/CSS and JavaScript. Let’s get started!
Step 1: Add some setup code to handle the player’s choice.
We’ll begin by adding code to set up when the player clicks the emoji to make their choice.
- Open the
app.jsfile, all of the code in this tutorial will go into this file. - Create a
playerChoicevariable representing the player’s choice and set it to an empty string (the""characters denote a string). We’ll declare this variable at the top of our file because we want to use it in a few places
Note: We’ll define all of our functions at the bottom of the file, and leave the variable declarations, event listener registration, and function calls at the top of our file.
var playerChoice = "";- Use
document.querySelector()to select the#player-choice-containerHTML element (the#means this is the ID of the element) and store it in a variable calledplayerChoiceContainer. This is the section that holds the player’s emojis.
var playerChoice = "";

var playerChoiceContainer = document.querySelector("#player-choice-container");- Attach an event listener to the
playerChoiceContainerthat will run thehandlePlayerChoice()function (which we’ll create next) whenever this container with the player’s emojis is clicked.
var playerChoiceContainer = document.querySelector("#player-choice-container");

playerChoiceContainer.addEventListener("click", handlePlayerChoice);- Create a function called
handlePlayerChoice()that records the players emoji selection. Since this is an event-handler function attached to a click event, use aneventparameter representing the click event in the parenthesis. Note that there is no change in the output for this step!
playerChoiceContainer.addEventListener("click", handlePlayerChoice);

function handlePlayerChoice(event) {

}
Step 2: Add logic to handle the player’s choice
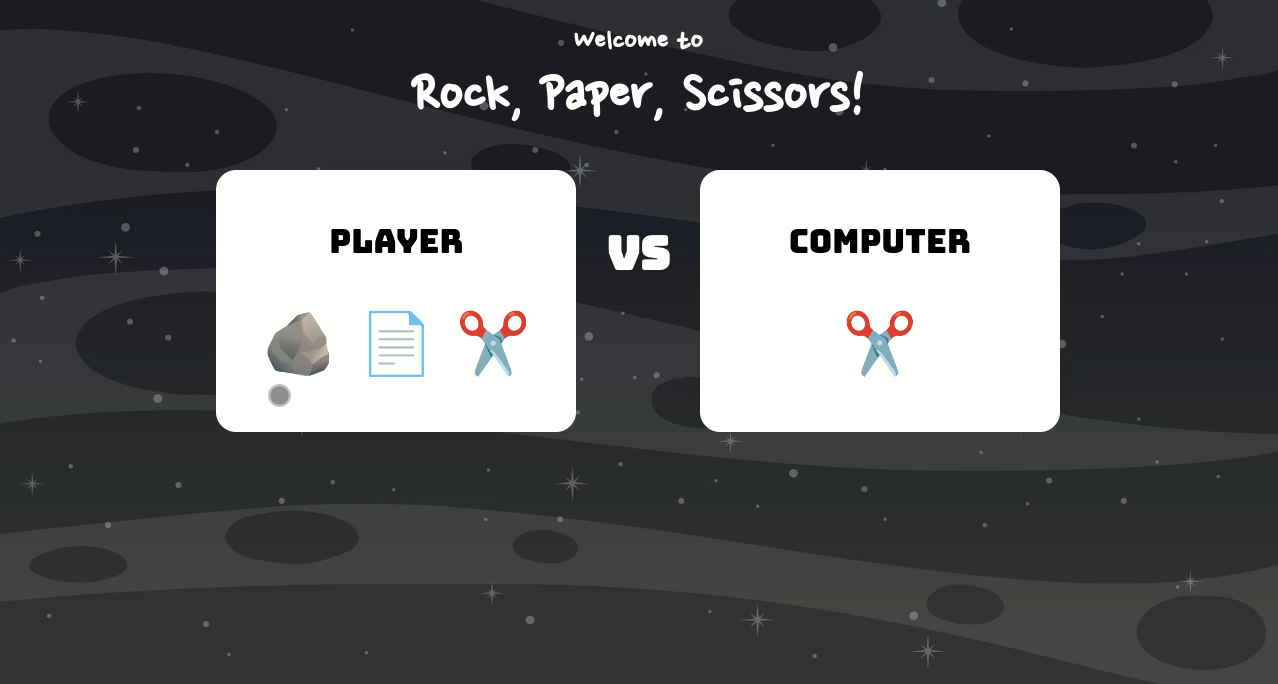
Once the player clicks on their emoji choice, we need to add logic that will save their choice and display it on the screen.
- In the
handlePlayerChoice()function, add an if statement. If the element that was clicked (theevent.target) does not (!) contain the class emoji, we will exit the function. This means that if a player clicks next to an emoji, none of the other function code runs. If they click on an emoji, it will run. Thereturnstatement exits a function immediately and can optionally return a value to the function caller.
function handlePlayerChoice(event) {
    if (!event.target.classList.contains("emoji")) return;

}- Get the text content of the clicked element (the emoji) and save it in the
playerChoicevariable. We’ll then change theinnerHTMLof theplayerChoiceContainerto only display the emoji that was clicked.
function handlePlayerChoice(event) {
    if (!event.target.classList.contains("emoji")) return;

    playerChoice = event.target.textContent;
    playerChoiceContainer.innerHTML = `<p class="emoji">${playerChoice}</p>`;

}
Step 2 Output

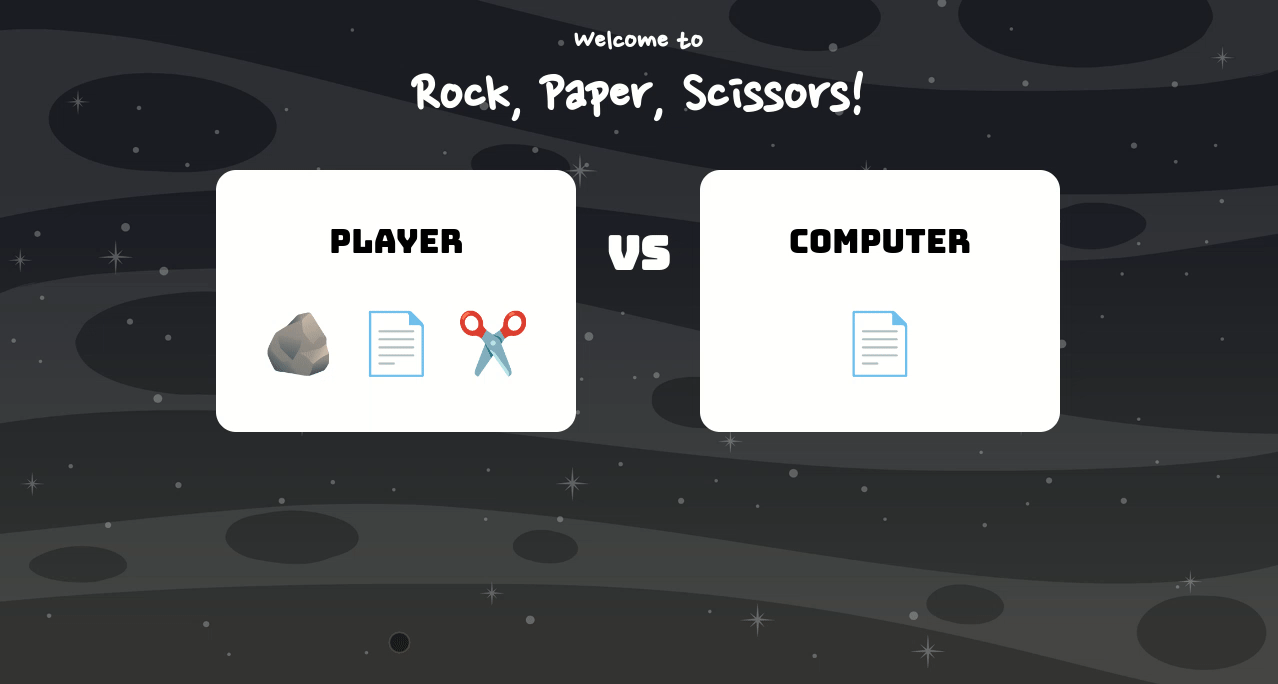
Step 3: Show an emoji on the page for the computer’s choice
We’ll create a function that will eventually shuffle the emojis on the page and display the computer’s choice. In this step, we’ll create the function and display a single emoji choice on the page.
- Create a variable called
computerChoicethat will hold the computer’s choice. We want to be able to access the variable in a few places so we’ll create it at the top of our file to ensure that it is global.
var playerChoice = "";
var computerChoice = "";- Create an array, a type of data that holds several items in a single variable, called
emojisthat holds the Rock, Paper, and Scissors emoji characters. Note that the scissors emoji needs to have an additional space after the emoji, as the quote characters overlap the emoji if you don’t add a space on the right-hand side in most text editors.
You can find each emoji here:
- https://emojipedia.org/rock/
- 🪨
- https://emojipedia.org/page-facing-up/
- 📄
- https://emojipedia.org/scissors/
- ✂️
var playerChoice = "";
var computerChoice = "";
/*
 * Note that the scissors emoji has to have an extra space!
 */
var emojis = ["✂️ ", "📄", "🪨"];- In a variable called
emojiShuffleElement, usedocument.querySelector() to get a reference to the#emoji-shuffleelement.
var emojis = ["✂️ ", "📄", "🪨"];

var playerChoiceContainer = document.querySelector("#player-choice-container");
var emojiShuffleElement = document.querySelector("#emoji-shuffle");- Next, create a function called
shuffleEmojis(). This will eventually shuffle through the computer’s three emojis on a timer, but right now, it’ll simply pick whatever emoji we ask for from theemojisarray and display it on the page. (Don’t type the...characters. Those are an indicator that we’re leaving out code you don’t need to worry about right now.)
function handlePlayerChoice(event) {
    ...
}

function shuffleEmojis() {

}- Get an item from the
emojisarray and store it in thecomputerChoicevariable. We use the[]brackets to access array items at an index number. Array indices start at 0, so the first element is at index 0, the second at index 1, etc. Here, we select the second item, the Paper emoji.
function shuffleEmojis() {
    computerChoice = emojis[1];
}- Get the text inside of your
emojiShuffleElementvariable by setting thetextContentof theemojiShuffleElementto thecomputerChoice(which represents the emoji text). If you don’t need to change the HTML of an element, thetextContentproperty is an easy way to display text on the screen.
function shuffleEmojis() {
    computerChoice = emojis[1];
    emojiShuffleElement.textContent = computerChoice;
}- Next, call the
shuffleEmojis()function. You should now see your chosen emoji appear under the “Computer’s Choice” text. Try changing the index number to a different emoji’s index inshuffleEmojis()to see if the emoji on the page changes! Note that you’ll need to refresh the page after each change in order to see the changes take effect.
playerChoiceContainer.addEventListener("click", handlePlayerChoice);

shuffleEmojis();

function handlePlayerChoice(event) {
  ...
}
Step 3 Output
Step 4: Shuffle the computer’s emoji choices
We’ll create a shuffle animation that shuffles through the Rock, Paper, and Scissors emojis quickly. This makes it seem like the computer is thinking about what choice it will randomly select.
- Create a variable called
currentEmojiNumberthat will hold the index number of the emoji we’re currently displaying on the page during the shuffling process. We’ll start with the first index in theemojisarray, index 0.
var emojis = ["✂️ ", "📄", "🪨"];
var currentEmojiNumber = 0;- In the
shuffleEmojis()function, use thecurrentEmojiNumberto pick an emoji out of theemojisarray.
function shuffleEmojis() {
    computerChoice = emojis[currentEmojiNumber];
    emojiShuffleElement.textContent = computerChoice;
}- We need to increase the
currentEmojiNumberif we’re not on the last index of theemojisarray and set it to 0 otherwise. We’ll use anif...elseconditional statement to do this. Note that theemojisarray has alengthproperty that we can use to find out how big it is and that the last index number is 1 less than the length of the array. Also, note that we can increase the value stored in a variable using the++operator, as we do on thecurrentEmojiNumberhere.
function shuffleEmojis() {
    computerChoice = emojis[currentEmojiNumber];
    emojiShuffleElement.textContent = computerChoice;

    if (currentEmojiNumber < emojis.length - 1) {
        currentEmojiNumber++;
    } else {
        currentEmojiNumber = 0;
    }

}- Remove the call to
shuffleEmojis(). We’ll have JavaScript call this function in an interval timer instead.
playerChoiceContainer.addEventListener("click", handlePlayerChoice);

shuffleEmojis();  // REMOVE THIS!

function handlePlayerChoice(event) {
  ...
}- Use the
setInterval()function to call theshuffleEmojis()function every 150 milliseconds. ThesetInterval()function is provided to us from the browser. It returns a reference to the ID of the running interval timer which we’ll store in a variable calledshuffleIntervalID. This ID can be used to stop the interval timer, which we’ll do in the next step.
var currentEmojiNumber = 0;

var shuffleIntervalID = setInterval(shuffleEmojis, 150);

var playerChoiceContainer = document.querySelector("#player-choice-container");
Step 4 Output
Step 5: Pick a random emoji for the computer
Now that the computer’s possible choices are shuffling between Rock, Paper, and Scissors, we need to actually pick a random choice for the computer after the player makes their choice.
- We’ll use the
clearInterval()function to stopshuffleEmojis()inside ourhandlePlayerChoice()function. Since theshuffleIntervalIDpoints to the interval timer that is runningshuffleEmojis(),clearInterval()will stop that timer.
function handlePlayerChoice(event) {
    if (!event.target.classList.contains("emoji")) return;
    playerChoice = event.target.textContent;
    playerChoiceContainer.innerHTML = `<p class="emoji">${playerChoice}</p>`;
    clearInterval(shuffleIntervalID);
}
Step 5 Output
Step 6: Decide who won the game
For our last step, we’ll create a function to see who won the game.
- Create a function called
determineGameWinner(). This function will hold all the logic to determine who won the game.
function determineGameWinner() {

}- Create two variables:
gameResultMessageElementandgameResultMessage. We can usedocument.querySelector()to get the HTML element with the ID ofgame-result-messageand then thegameResultMessageElement. We’ll make thegameResultMessagean empty string for now because we won’t know the value of this variable until we determine who won.
playerChoiceContainer.addEventListener("click", handlePlayerChoice);

function determineGameWinner() {

    var gameResultMessageElement = document.querySelector("#game-result-message");
    var gameResultMessage = "";

}

function handlePlayerChoice(event) {
  ...
}- We can use a chain of conditional statements to determine if there is a tie, if the player won, or if the computer won. Set the
gameResultMessagein the body of each conditional statement. Note that we only need to check for a tie and if the player won. If neither of those results occurs, then we can use theelseclause to state that the computer won. Also, please make sure to add an extra space to the right of the scissors emoji to ensure your program works correctly (there’s an extra space in the HTML and in ouremojisarray).
function determineGameWinner() {
    var gameResultMessageElement = document.querySelector("#game-result-message");
    var gameResultMessage = "";

    if (playerChoice === computerChoice) {
        gameResultMessage = "It's a tie!";
        // Note the extra space in the scissors emoji!
    } else if (playerChoice === "🪨" && computerChoice === "✂️ ") {
        gameResultMessage = "Player wins!";
    } else if (playerChoice === "📄" && computerChoice === "🪨") {
        gameResultMessage = "Player wins!";
    } else if (playerChoice === "✂️ " && computerChoice === "📄") {
        gameResultMessage = "Player wins!";
    } else {
        gameResultMessage = "Computer wins!";
    }

}- The final thing our function needs to do is add our
gameResultMessageto the page. We do this by making it thetextContentof thegameResultMessageElement. We can also stick the string “Refresh to play again!” on the end of ourgameResultMessageso users of our app know how to play another game.
function determineGameWinner() {
    ...

    if (playerChoice === computerChoice) {
        gameResultMessage = "It's a tie!";
        // Note the extra space in the scissors emoji!
    } else if (playerChoice === "🪨" && computerChoice === "✂️ ") {
        gameResultMessage = "Player wins!";
    } else if (playerChoice === "📄" && computerChoice === "🪨") {
        gameResultMessage = "Player wins!";
    } else if (playerChoice === "✂️ " && computerChoice === "📄") {
        gameResultMessage = "Player wins!";
    } else {
        gameResultMessage = "Computer wins!";
    }

    gameResultMessageElement.textContent = gameResultMessage + " Refresh to play again!";
}- As the final step, we’ll call our
determineGameWinner()function inhandlePlayerChoice()after all of the other function code has run:
function handlePlayerChoice(event) {
    if (!event.target.classList.contains("emoji")) return;
    playerChoice = event.target.textContent;
    playerChoiceContainer.innerHTML = `<p class="emoji">${playerChoice}</p>`;
    clearInterval(shuffleIntervalID);
    determineGameWinner();
}
Step 6 Output

Your game is complete!
Check out the finished project.
Download the project files and open app.js to view the completed project code.
Add this fun game to your portfolio and show it off to family and friends. You can even customize the code to be your own version of Rock, Paper, Scissors with new rules and design.
Download JavaScript Projects Source Code
If you want to get the code behind 7 different JavaScript projects, download the full source code for free. You can use this code as an example to add to or inspire new projects. Enter your email below:
If you want to code more websites and games in JavaScript, join CodeWizardsHQ’s live coding classes for kids. It’s the most fun and effective way for kids to learn JavaScript and other real-world languages.
Students in all of our core programming tracks study JavaScript because of its importance in web development and beyond. They work with a live, expert instructor who supports them every step of the way. Classes are engaging and you’ll build a portfolio of websites, games, and apps as you learn.