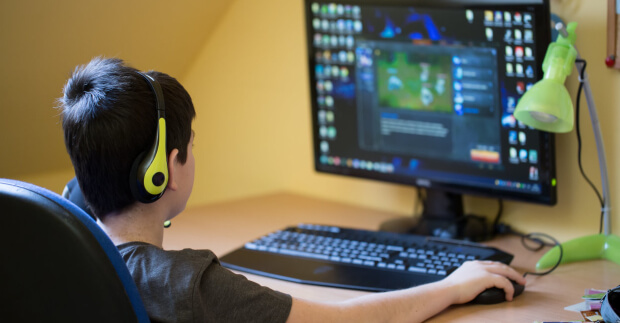
JavaScript games are fun, easy to build, and a great way for kids to learn coding. JavaScript is a very popular programming language that is used on nearly every website on the internet. Adding JavaScript to a web based application can bring to life animations and interactions that make browsing and playing games even better.
One popular topic that attracts kids to learn how to program using JavaScript is its ability to make games that are easily played on the web. With internet speeds increasing and computer hardware becoming more advanced, it’s no wonder that the last decade has seen a rising amount of game developers creating new content by using JavaScript.
Is JavaScript Good for Game Development?
Now that you know JavaScript coding can be used to make games, it brings the question of whether it is good for this task.
Yes! JavaScript is a great language for game development, depending on the type of game you want to create.
JavaScript is best for web-based and mobile games. It’s also a great language for kids to learn because it’s generally easy to understand and has plenty of resources for coders readily available online. We encourage teaching JavaScript in middle school and high school.
JavaScript games can be played in the browser or mobile phone, so, if that’s your goal, it’s an excellent option. Using platforms and tools can help create both 2D and 3D games that can run directly in your browser. Aside from only web-based games, JavaScript has been increasing in popularity in mobile game development.
On the contrary, if you’re looking to create the next big AAA game, like Call of Duty or FIFA, using JavaScript, you may find it challenging. Even though the language is very versatile, JavaScript is much slower than languages such as C++ and consumes much more memory. Advanced games require heavy GPU calculations and it’s a substantial amount of weight to carry that JavaScript just isn’t cut out for.
JavaScript vs Java for Game Development
We often hear people compare JavaScript and Java and even sometimes incorrectly use these words interchangeably. In actuality, JavaScript and Java are completely unrelated and the main thing that they have in common is that they are both programming languages containing the word “Java.”
JavaScript is an interpreted scripting language while Java is a compiling language. As an interpreted scripting language, code does not need to be compiled. Instead, results are interpreted by a user’s command. This is why it works so well when creating websites. Users are often clicking around and scrolling on a website, which is input that JavaScript can use to perform an action accordingly.
Java, however, requires code to be compiled before it can be run. That means the code is translated into a machine language for the computer to understand.
Now that that’s out of the way, what is the potential for these languages when it comes to games? Once again, if your goal is to make web browser games, JavaScript may be your ideal choice. But if your ideal type of game is something that can run on a PC or console, Java may be a better language. A very popular game that is built with Java is Minecraft.
Recommended: Summer Minecraft Camp for Kids
Popular games in JavaScript
Many popular online games were built using JavaScript. Kids who want to do JavaScript game coding can use these as inspiration. Check out some of them below!
- Tower Building is a great way to get started with JavaScript games. The game allows players to stack blocks to create a very tall tower. This is a fantastic game to look at because it not only includes a QR code for you to play on your phone, but you can also browse, fork, and clone the GitHub repository to see how the game was created.
- Bejeweled was created as an in-browser game in the early 2000s. It’s similar to Candy Crush where you have to match three jewels in a row to score points.
- 2048 is an addicting game that allows you to use your arrow keys to move tiles around in a grid. The idea is to merge tiles until they equal 2048. Fun fact, one of the first Python scripts I wrote was a way to automatically play this game for me!
- Polycraft is a 3D game that is playable in your browser. Polycraft is full of adventure, exploration, base-building, gathering, crafting, and even fighting. It’s an excellent example of how you can move past 2D games with Javascript.
- Words With Friends 2 is a mobile app game that uses React Native, a framework that utilizes JavaScript to create mobile applications. Zynga chose to use React Native for its ability to create a game that can be played on multiple platforms using JavaScript with one code-base.
Recommended: Coding Programs for Kids & Teens
What Are the Best JavaScript Game Engines
JavaScript code is purely text, and while it’s powerful, JavaScript cannot do everything alone. When developing games with JavaScript it’s very common to use a game engine or rendering library. Kids who learn to incorporate game engines in their programs will be taking the next step into making their dream game come to life.
Game engines are software that allows you to create extra components for games such as sound, animations, graphics, and physics. There is a multitude of options when looking for a game engine or rendering library for your game that can be used for your specific needs. Here are some popular examples to choose from.
PixiJS
PixiJS is an open-sourced engine that prides itself on speed and beautiful API. The 2D renderer also has cross-platform support so you can make your game for multiple applications. Being open-source also allows a highly supportive community to take part in providing consistent improvements to the engine.

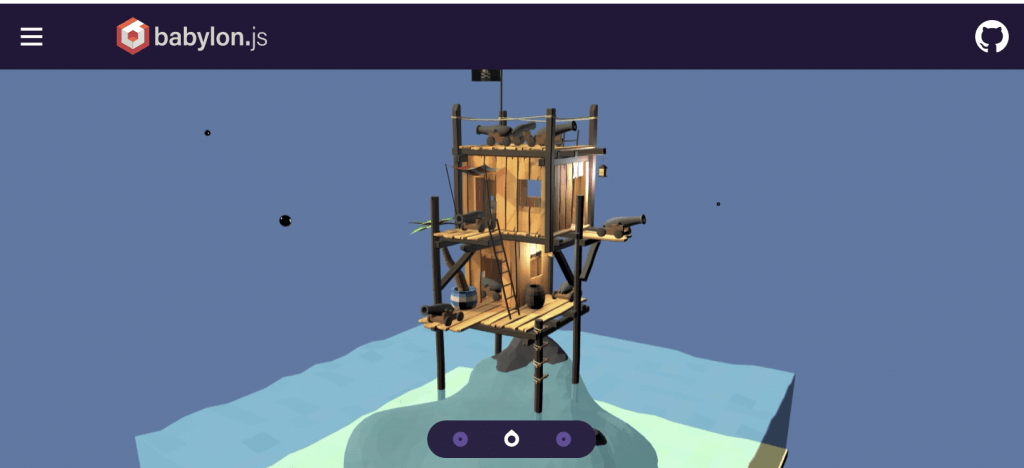
BabylonJS
BabylonJS is a rendering library that has very powerful tools that allow you to create anything from simple animations to 3D games. Like PixiJS, BabylonJS is also open-sourced and has a large community of developers to help it grow.
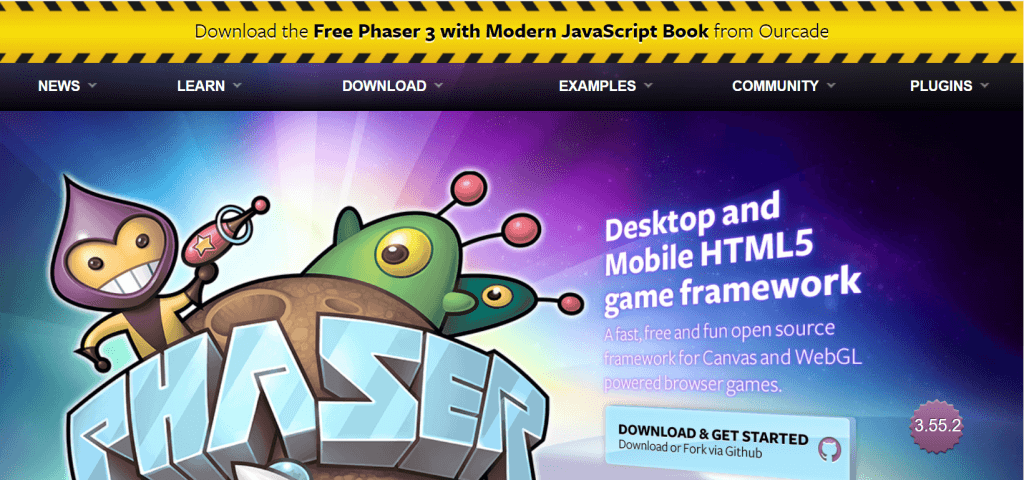
Phaser
Phaser offers support for desktop and mobile HTML5 games. Its focus is on 2D game development that can be compiled to multiple platforms. A benefit of using Phaser is the ability to use additional plugins as needed. This allows you to keep your tools small in size so you don’t have too many unnecessary components.
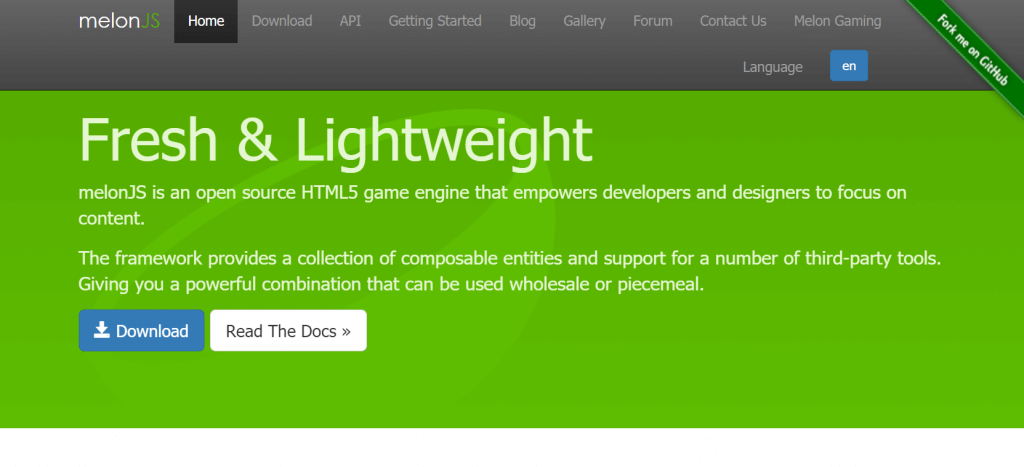
melonJS
The melonJS framework is lightweight but provides the ability to add plugins as you see fit. It allows you to add features such as collisions, sprites, physics, particle effects, and more. It’s also known for being very beginner-friendly compared to other game engines.
Three.js
Another popular library for rendering 3D graphics in a web browser is Three.js. It’s fairly easy to learn and is highly popular, which means there are an endless amount of examples available. Its default renderer is WebGL, but it also provides support for SVG, Canvas 2D, and CSS3D renderers.
Recommended: JavaScript Classes for Kids & Teens
How to Code a Game in JavaScript
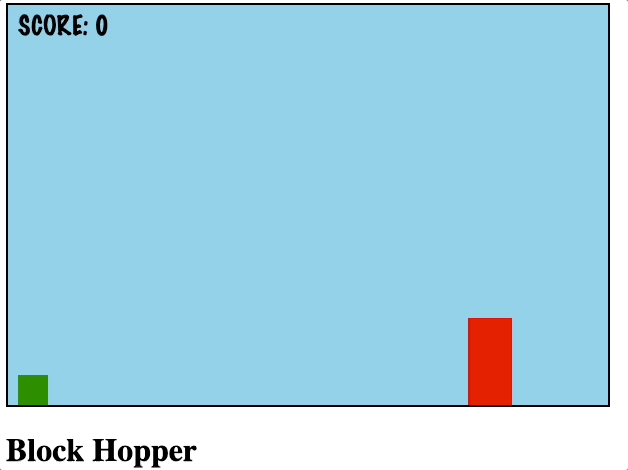
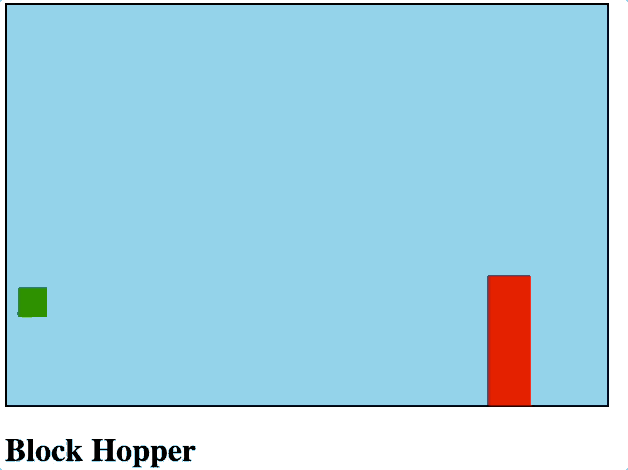
If you want to make a quick and easy JavaScript game right now, then you’re in the right spot. These steps will guide you through the process of creating your own block jumper game. You can also download the completed JavaScript Block Hopper code.
Step 1 – Select a Code Editor
To get started, head over to an editor of your choice. The examples shown here will be using our CodeWizardsHQ editor, which students in all of our coding classes have access to. If you are not currently a student with us, you can use another online editor like CodePen.
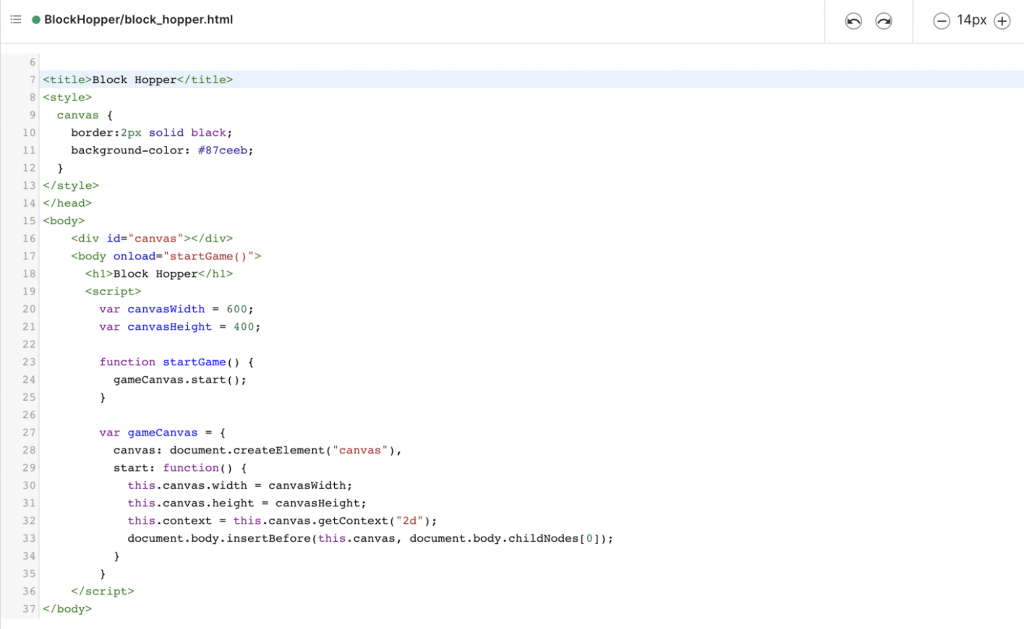
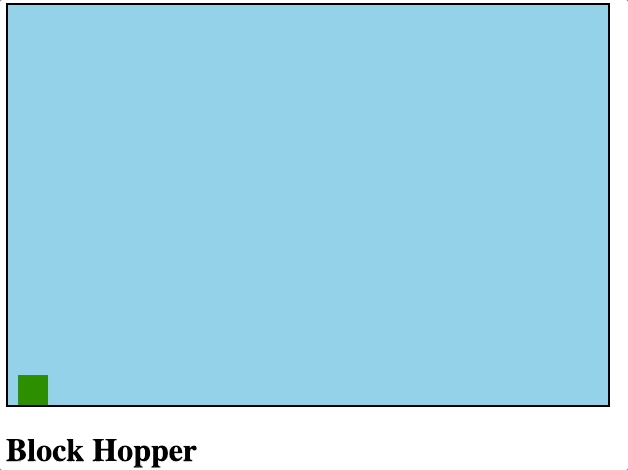
Step 2 – Build a Game Canvas
The first piece of code we will write will establish a canvas for our game. You can adjust the height and width as needed. This takes four steps.
- Add your canvas code inside your <style></style> tags
- Create your startGame function and define your variables and getCanvas inside your <script></script> tags
- Call startGame in the <body></body> tags onload.
- If you’d like, add a title using an <h1></h1> tag inside the <body></body> tag
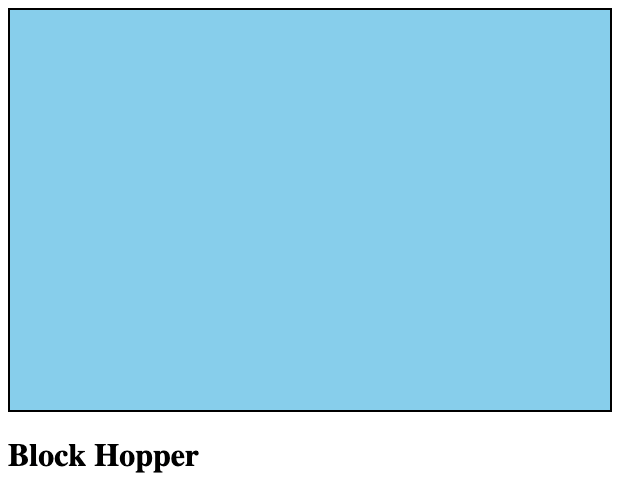
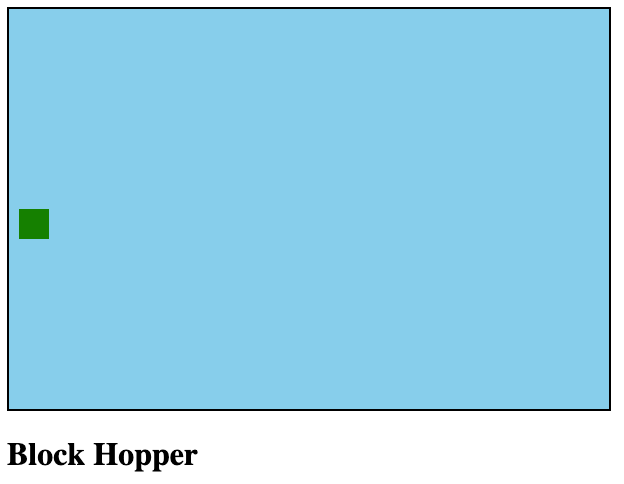
You should see a light blue rectangle with our game title, Block Hopper. This will be the background of our game.
Note: after this step all code you write will go inside the <script></script> tags.
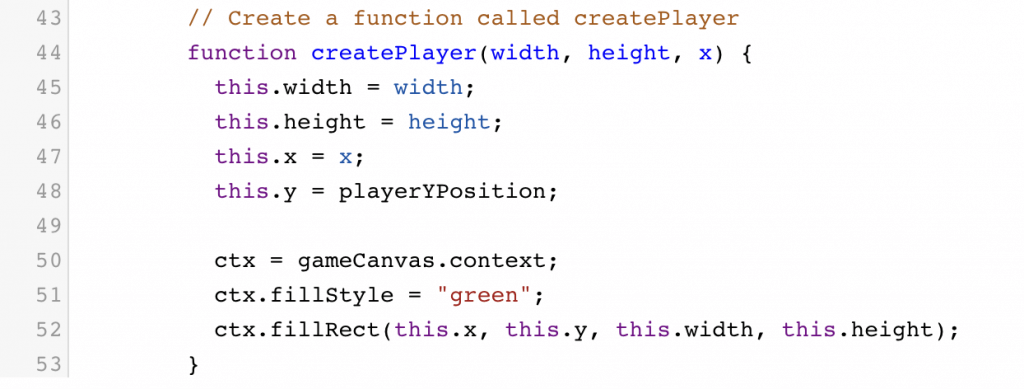
Step 3 – Code Your Player, The Hopper
Next, let’s add our player. We will do this in four steps.
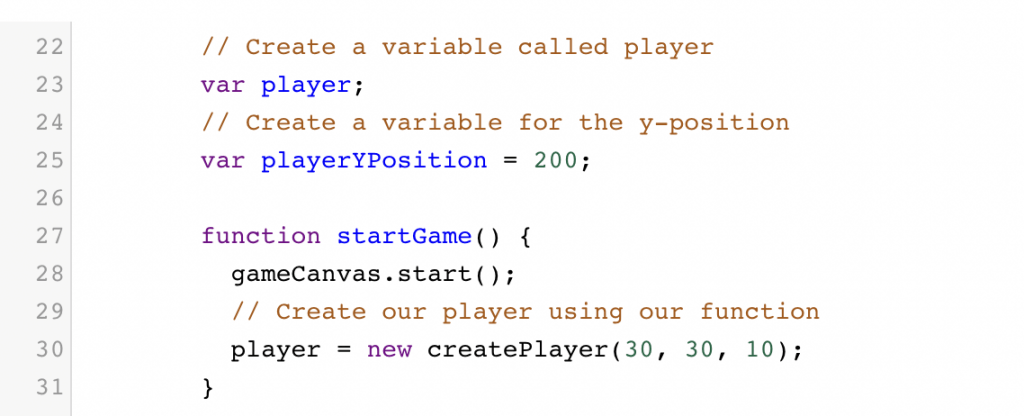
- Create a variable called player.
- Create a variable to hold the Y position of the player.
- Create a function called createPlayer() that has parameters for width, height, and x-position.
- In startGame() create our player using the function from step 3 and assign it to the variable created in step 1.
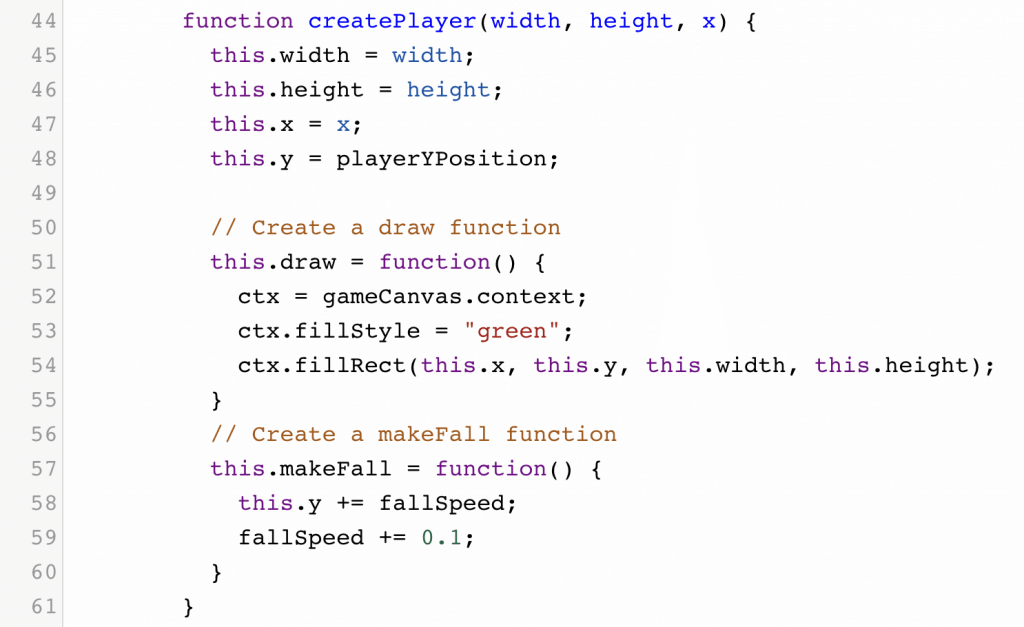
Step 4 – Add Gravity to Your Player
Let’s create some gravity for the player. Here are the steps.
- Create a variable fallSpeed.
- Create a new interval and hold it in a variable that calls our updateCanvas() function.
- Create two functions for our player; one to draw and another to move the player.
- Create an updateCanvas() function that clears the canvas and redraws the player.

Step 5 – Add Code Functionality to Your Player
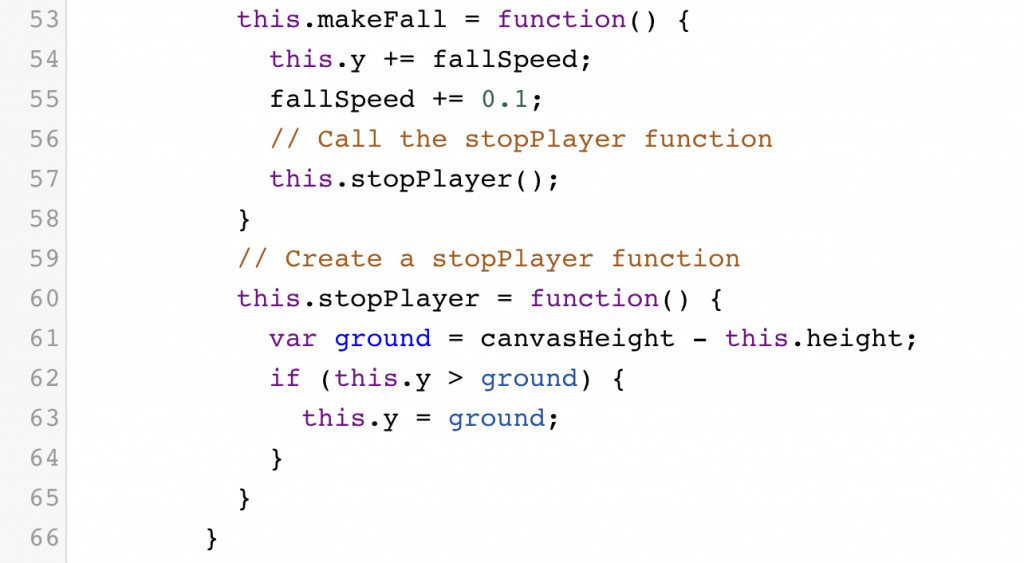
Our player is falling, however, we want our player to stop as soon as it hits the ground. Add the following stopPlayer() function inside your createPlayer() function. Then call the function at the end of movePlayer().
Step 6 – Code Jump Logic for Your Player
Now, let’s allow our player to jump when we press the space bar.
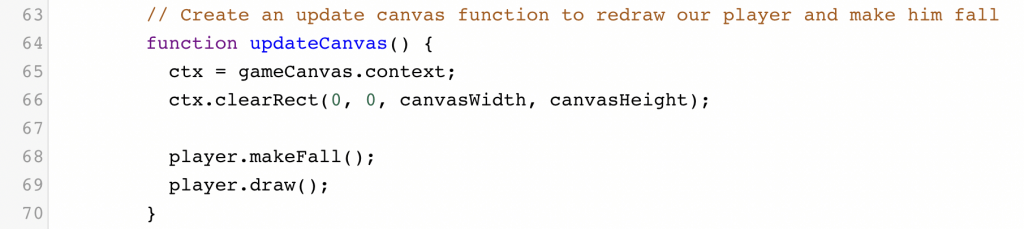
- Create an isJumping boolean and jumpSpeed property.
- Create a jump() function inside your createPlayer() function.
- Update our makeFall() function.
- Call our jump() function inside updateCanvas().
- Create a resetJump() function.
- Toggle the isJumping boolean and call the resetJump() once we press spacebar.

Step 7 – Build the Attack Block
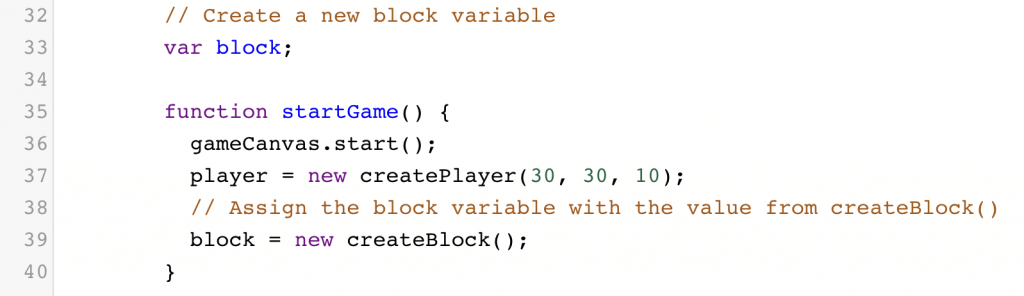
It’s time to create a block to attack you. This will be similar to creating the player, but we will add some randomization for our block’s properties.
- Create a new block variable and createBlock() function
- Assign the block variable with a value from createBlock()
- Call the function inside startGame() and assign it to your variable
- Create a randomNumber() function
- Inside your createBlock() function, assign random numbers for width, height, and speed. Then create a draw() function and attackPlayer() function.
- In updateCanvas(), call block.Draw() and block.attackPlayer();

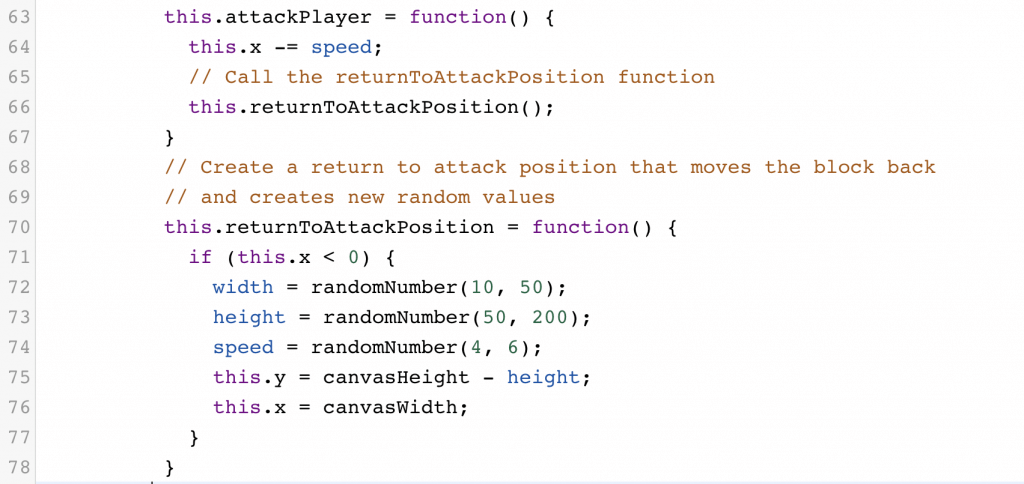
Step 8 – Add Logic to Move Your Player
Great! Now our block moves to attack our player, however, once it gets to the edge of the screen it never returns. Let’s fix that.
- Create a returnToAttackPostion() function inside createBlock()
- Reset the width, height, speed, and x and y value of the block
- Call the new function at the end of attackPlayer()
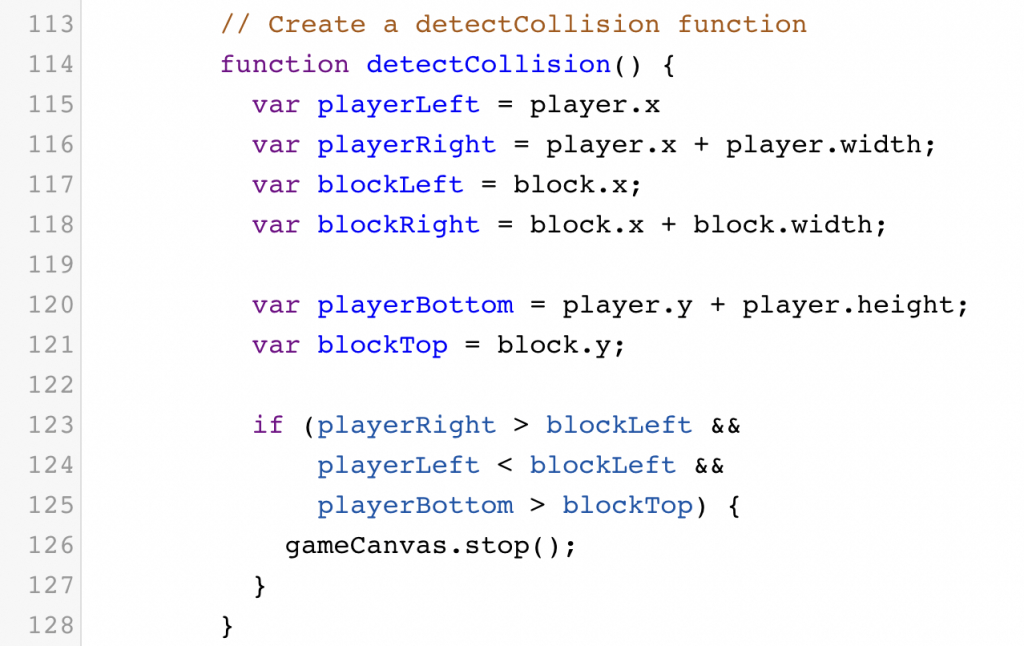
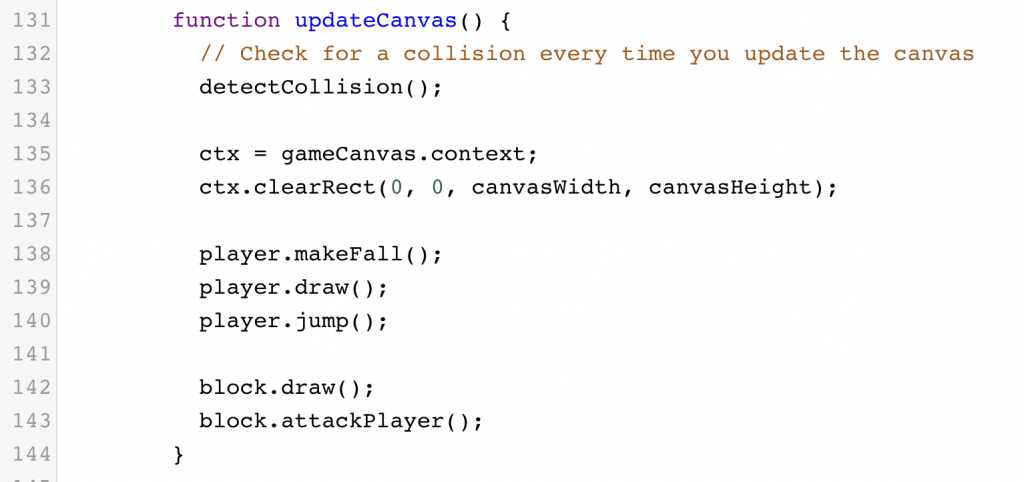
Step 9 – Stop the Game on Collision
When the block successfully attacks the player we need to end the game. It’s time to write a detectCollision() function that stops the game once a collision happens. Call the detectCollision() function in your updateCanvas() function.

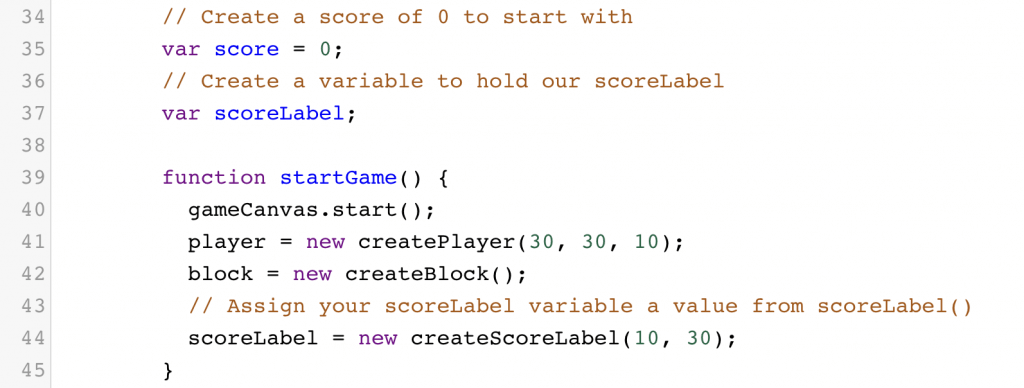
Step 10 – Add a Score to the Game
For the grand finale, we will add a score to our game. This is done much the same way as creating shapes, except we will specify a fillText property and font.
- Create a score variable equal to 0 to start. While you’re there, create a scoreLabel variable to be used later.
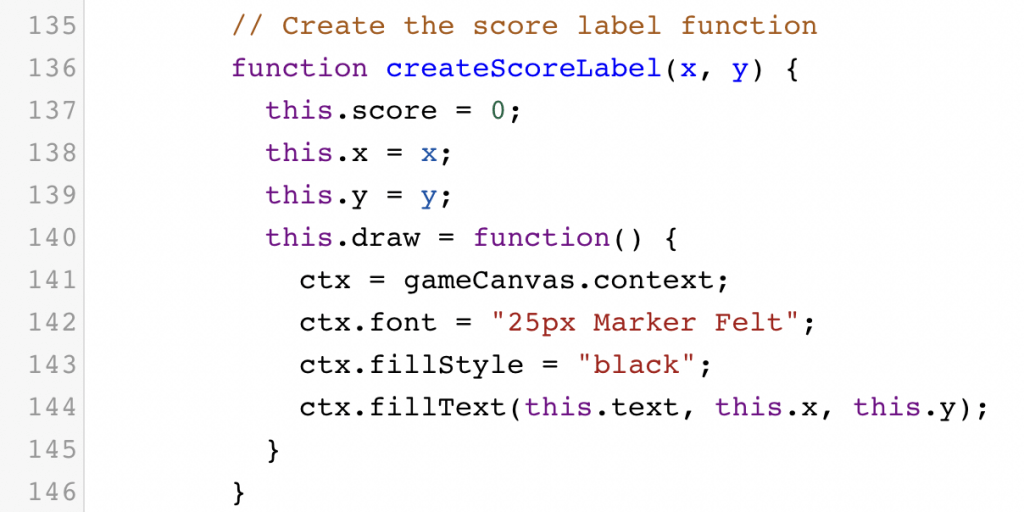
- Create a createScoreLabel() function with a draw() function.
- Assign your scoreLabel a value with our createScoreLabel() function
- Call scoreLabel.draw() in updateCanvas()
- Increase your score once your block makes it to the end
Complete Your First JavaScript Game!
And there you have it, you have coded your first JavaScript game. However, the best way to get better at programming is to write code yourself. Below are a few different challenges that you can try to add to your game.
- For an easy challenge, change a few of the variables such as fallSpeed or jumpSpeed. Play with it a bit until you get to a setting you like.
- For a medium-to-difficult challenge, create a new label on the other side of the screen that holds how many lives you have. Starting with three lives, you lose one every time you have a collision. Once you’re out of lives then it’s game over!
- For a difficult challenge, add a new object in the game that gives you bonus points if you touch it. This will involve creating a new function to create the object and adding collision detection. It’s probably a good idea to make the object float, too!
If you want to see and play the completed game, go to https://mediap.codewizardshq.com/BlockHopper/block_hopper.html
You can also download the completed JavaScript Block Hopper code.
Download JavaScript Projects Source Code
If you want to get the code behind 7 different JavaScript projects, download the full source code for free. You can use this code as an example to add to or inspire new projects. Enter your email below:
Learn JavaScript Programming with Our JavaScript Classes for Kids
You’ve made it this far! You are on your way to becoming a JavaScript game developer. This was only the beginning of unlocking many new skills to help you make the game you have always wanted.
If you want to continue learning how to code and build your own games, CodeWizardsHQ offers virtual coding classes for teens that teach the fundamentals of real-world programming languages. Every class is taught by a live teacher with other kids who are excited to code just like you. Our classes include JavaScript and feature fun projects like making your own slot machine and Space Wars game.
Ready to level up your child’s learning experience? Take a coding class with CodeWizardsHQ:
With the help of our CodeWizardsHQ teachers, you’ll be amazed at how far you can go with your own JavaScript game development!