There’s a way to make your Scratch game or project more immersive with just the addition of one or two sprites. A scrolling background is a fun and simple effect where sprites are used to create the illusion of movement and motion. It’s often combined with other effects to enrich a game or project and make it more visually appealing.
In this tutorial, I’ll show you how to make a scrolling background in Scratch. Just like in the real world, backgrounds and locations change as we move. We’ll try to recreate this with our Walk In The Park project. It’s a great effect to add to any project, so give it a try!
View and remix the Walk In The Park project now.
Table of Contents
- Step 1: Create a New Scratch Project
- Step 2: Draw the Background
- Step 3: Animate the Cat Walking
- Step 4: Draw the background sprites
- Step 5: Animate Sprite 1 in the Hills Background
- Step 6: Animate Sprite 2 in the Hills Background
- Bonus 1: Add and Animate a Cloud Sprite
- Bonus 2: Add music to your project
What you need:
- Scratch account: Create a free Scratch account
No coding experience is necessary for this scrolling background tutorial. Beginner-friendly for kids ages 8 and up.
How to Make a Scrolling Background in Scratch
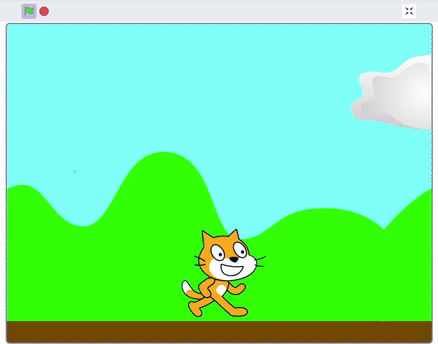
Our project is comprised of three different parts: the walking cat, the floating cloud, and the rolling hills.
Step 1: Create a New Scratch Project
We always start in Scratch by creating a new project.
- Visit https://scratch.mit.edu/
- Login to your account
- Click on the “Create” button at the top

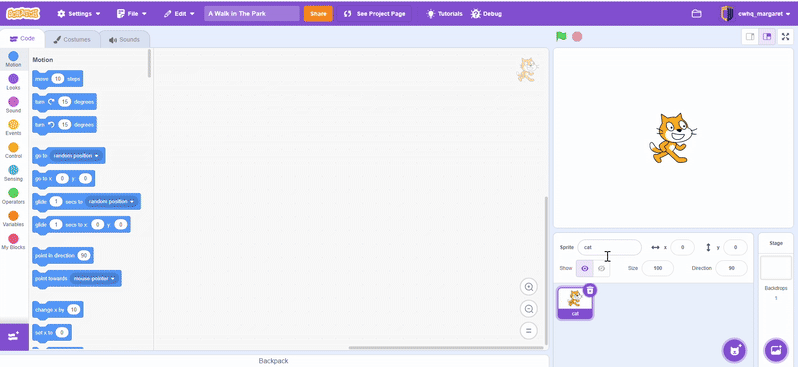
- A new project will open, rename the sprite to “cat”
- Rename your project to “A Walk In the Park”

You’re ready to code!
Hint: Name your project anything you want and click on the orange “Share” button to make it available for others to remix.
Step 2: Draw the Background
The cat is walking in a basic setting with a blue sky and dirt path. We’ll create this scene as a backdrop.
- Hover over the “Choose a Backdrop” icon and select “Paint”

- Use the rectangle tool to draw a blue rectangle for the blue sky
- Use the rectangle tool to draw a brown rectangle for the dirt path

In the preview screen, you will see your cat sprite and the background you drew. You can reposition your cat sprite around to fit your new scene. This backdrop is not part of the moving background.
Once you’re finished designing your backdrop, we can animate the cat to take a stroll!
Hint: You can draw more details in the background to fit your game or project.
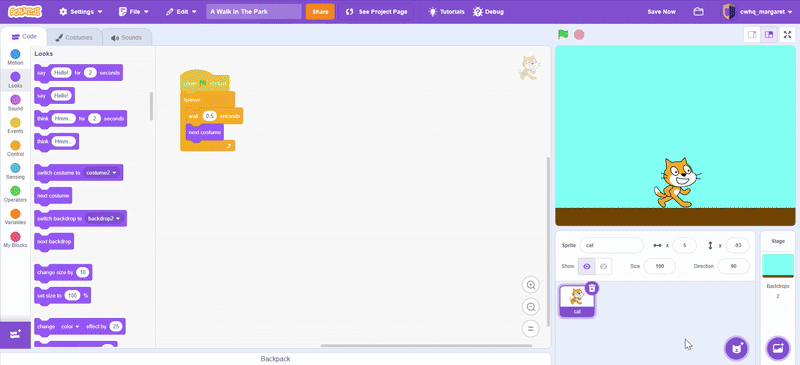
Step 3: Animate the Cat Walking
The cat sprite stays in place on the path, but appears to be walking. We animate the cat by changing its costume from having its foot down to up, then repeating that process.
- Click on the “cat” sprite to add code to it
- Start with a “when green flag clicked” block from the Events category
- Add a “forever” loop to continuously run the code blocks inside
- Inside the loop, add a “wait 0.5 seconds” from the Control category
- Underneath the wait block, add “next costume” to change costumes

This means that every 0.5 seconds, the cat’s costume will switch.
Press the green flag to test your code. It should look like your sprite is walking!
If it works, let’s move on to add a scrolling background.
Hint: See the different costumes in the “costumes” tab and add costumes to create your own walking effect.
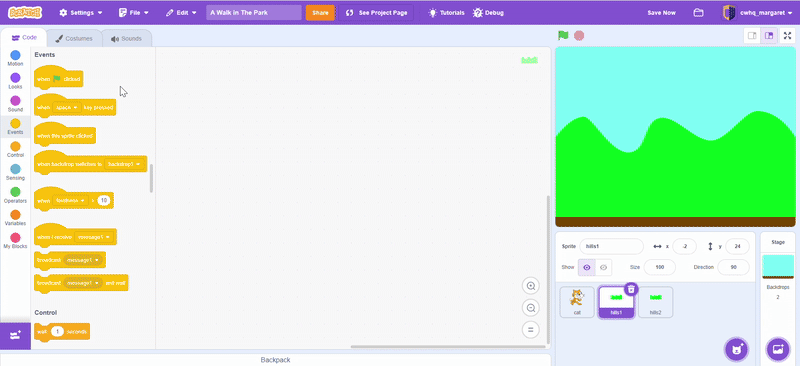
Step 4: Draw the Scrolling Background Sprites
We need to draw two sprites to represent the hills that scroll in the background. These sprites will move across the screen to create the scrolling effect.
- Hover over the “Choose a Sprite” icon and select “Paint”

- Use the square tool to draw a green rectangle from one edge of the project screen to the other
- Add a few points on the top of the rectangle using the “Reshape” tool
- Drag the points up and down to create multiple hills. The only points you should not change are the corners of the rectangle, so that the two points line up in the animation.

In order for our sprite to go off the screen as it moves, we will add a transparent box behind it that increases the width of our sprite.
- Use the square tool to draw a transparent rectangle from one edge of the artboard to the other.
- Then, rename the sprite “hills1”

Now, create the second sprite.
- Right-click on the “hills1” sprite and select duplicate

- Rename the new sprite “hills2”

In your preview screen, you can see both sprites. These two sprites are all you need to make a seamless scrolling background!
Hint: You can change the color of the “hills2” sprite so you can see how the effect is working in your preview screen. Later, change it back to match “hills1”.
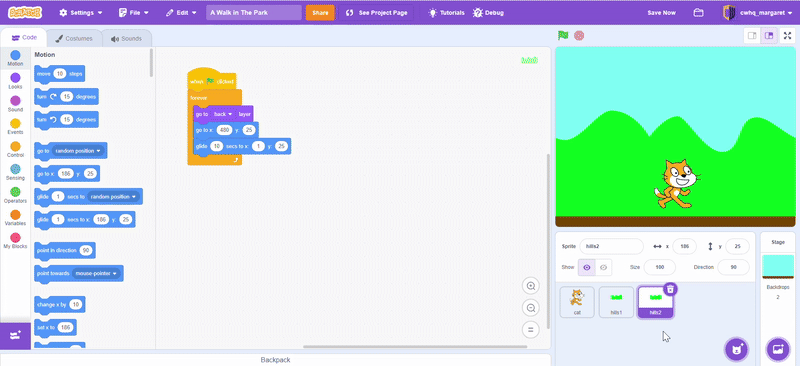
Step 5: Animate Sprite 1 in the Hills Background
The background position of the hills sprites will move from right to left and then start that process again continuously like this:
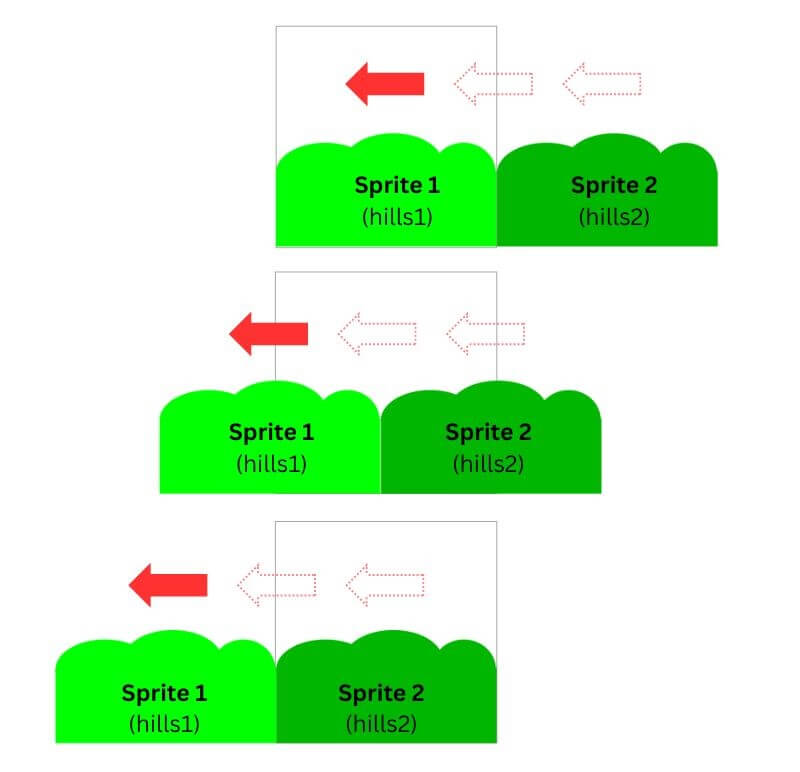
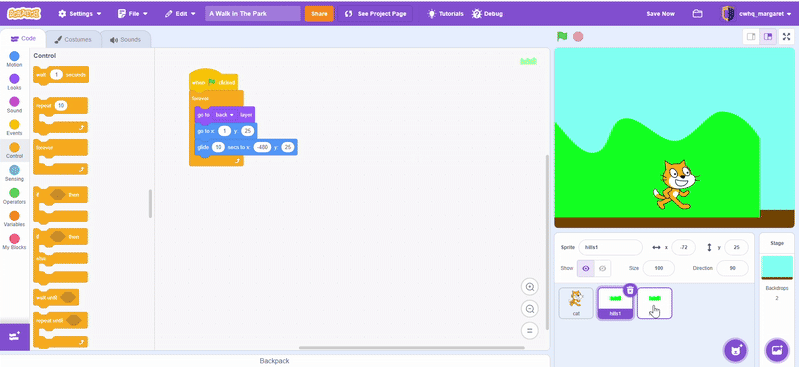
The “hills1” sprite starts in the center of the project. When we start the program, place it there.
- On the “hills1” sprite, add a “when green flag clicked” block
- In the preview screen, set the “hills1” sprite in the center. Use those x and y coordinates in a “go to” block. My sprite is positioned at x = 1 and y = 25 so I will use those coordinates.

Next, we want the sprite to scroll all the way to the left until it goes off the screen.
- In the preview screen, set the “hills1” sprite just off the left side of the screen. Use those x and y coordinates in a “glide 10 seconds to” block. My sprite is positioned at x = -480 and y = 25.

- You might have noticed your “hills1” sprite covers the “cat” sprite. Under “when green flag clicked” add a “go to back layer” from the Looks category.
- Wrap a “forever” loop around these blocks to repeat the actions.

Click the green flag to see your “hills1” sprite moving to the left. Keep it up, only a few steps left!
Hint: Experiment with the timing and position of your sprite to fit your animation.
Step 6: Animate Sprite 2 in the Hills Background
The code for the second hills sprite will have the same format as the first sprite. However, the sprite will start at the right side of the screen and move to the center.
When we start the program, place “hills2” off to right side of the screen.
- On the “hills2” sprite, add a “when green flag clicked” block
- Next add a “forever” loop underneath it, since we want to repeat these actions
- Inside the loop add a “go to back layer” block
- In the preview screen, set the “hills2” sprite just off of the right side of the screen.
- Use those x and y coordinates in a “go to” block. My sprite is positioned at x = 480 and y = 25.

Now, we want the sprite to move to the left until it gets to the center where the “hills1” sprite started.
- Add “glide 10 seconds” block and use the same coordinates that “hills1” sprite started with.

Click the green flag to see your hills moving to the left. Is everything working properly?
Hint: If you are seeing a gap between your two sprites, increase or decrease the x position on the hills sprites.
Your scrolling background is complete! View and remix A Walk In The Park project.
This is just one way to create a scrolling background effect. You can test different designs, speeds, and timings to create a unique experience for your project or game. In the bonus steps, I will show you how to animate a cloud in the background scroll and add music to your project.
If you want to learn from the experts, join our top-rated Scratch classes for kids.
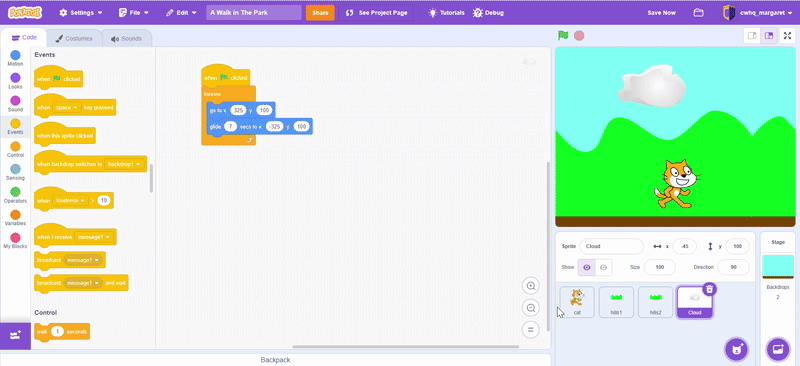
Bonus 1: Add and Animate a Scrolling Cloud Sprite
Let’s create a scrolling background animation with only one sprite.
- Click on the “Choose a Sprite” icon

- Search for the “cloud” sprite and click to add it

- Since we want this sprite to go offscreen, go to Costumes tab and use the square tool to add a transparent rectangle in the background. This will allow the sprite to go off screen.

Now, let’s add the code that moves the cloud object.
- Click on the “Code” tab
- Start with a “when green flag clicked” block
- Add a “forever” block from the Control category
- Add a “go to” block inside the loop. Position your cloud to the right off-screen and use those coordinates, mine are x = 325 and y = 100
- Then, glide the cloud to the left side of a screen with “glide 7 seconds to”. Position your cloud to the left off-screen and use those coordinates, mine are x = -325 and y = 100

Press the green flag to see your cloud floating in the sky.
Hint: Change the number of seconds in the glide block to make your cloud move faster or slower.
Bonus 2: Add Music to Your Scrolling Background Project
First, let’s set the background music we want to add.
- Click on the cat sprite and go to the “Sounds” tab
- Click on the “Choose a Sound” icon at the bottom

- Select a sound from the “Loops” category. I’m using Dance Around.
Now, let’s add the code that plays the music in the background.
- Go to the “Code” tab
- Add another “When green flag clicked” block
- Underneath that, use a “forever” block to continuously play the music
- Inside the loop, use a “play sound until done” and select the sound you chose.

Hit the green flag to listen to the song. What a nice atmosphere you’ve created by adding background music to your scene!
Hint: You can upload a music file or even record a song to play in the “Sounds” tab.
Learn More Scratch Effects with Tutorials
There are so many possibilities in Scratch! You can learn to code different effects, like the scrolling background, through tutorials or join a Scratch class to learn from the experts.
Try one of these fun beginner tutorials next.
Download Free Printable Scratch Coding Tutorials PDF
Get the Rocketship Landing game and Flying Space Cat Scratch tutorials in a printable format.
Try a Scratch Coding Class for Kids
Now you know how to make a scrolling background in Scratch! It’s simple and you can include it in any game or project you code to make it better.
Kids can also learn Scratch from the experts in our elementary school coding program. It’s designed to teach kids, ages 8-11, how to think like programmers while building fun, interactive projects. Students learn fundamental programming concepts in Scratch and then advance to text-based languages like JavaScript and Python. It’s the best way for kids to learn Scratch.
Explore our programs and join our top-rated Scratch classes for kids.